REVIEW · OSAKA
Learning Zen of Japanese Calligraphy in kimono near Osaka Castle
Book on Viator →Operated by SAMURAI HONOR · Bookable on Viator
Kimono calligraphy feels like quiet magic. In one hour near Osaka Castle, you’ll learn shodo from a professional teacher, dress in traditional clothing, and write your own piece while an English-Japanese or Chinese-Japanese translator helps you follow along. I love the hands-on practice time, and I love that you choose your own kanji and leave with a finished result. One thing to watch: the meeting spot is a small storefront, so build in extra time and be on time, because late arrivals may be refused.
This class is set up for first-timers and also works for kids, so you’re not stuck doing a stiff tutorial. The tone is calm and focused, with step-by-step brush basics like tome, hane, and harai. With a max group size of 10, it stays personal—but you should expect the experience to be structured, not a casual wandering-photo stop.
In This Review
- Why This Shodo-and-Kimono Class Works So Well Near Osaka Castle
- First Moment: Dressing in Traditional Clothing (Plan for a Little Time)
- The Teacher-Led Mindset: What Shodo Is vs What People Expect
- Stroke Basics You Can Actually Use: Tome, Hane, Harai
- Choosing Your Kanji: Make It Personal, Not Generic
- The Step-by-Step Flow: From Practice to Final Draft
- Photo Time and Digital Souvenirs: Easy Memories After the Class
- Small-Group Size Means Real Help (Max 10)
- Value Check: $43.59 for One Hour of Culture You Can Take Home
- Timing and Finding the Place: Don’t Over-Rely on Google Maps
- Who This Fits Best (And Who Should Skip It)
- Should You Book It? My Practical Recommendation
- FAQ
- FAQ
- How long is the Japanese calligraphy class?
- What’s included in the price?
- Can kids join?
- What languages are available?
- Is there a limit on group size?
- Is there an extra option for hair styling?
Why This Shodo-and-Kimono Class Works So Well Near Osaka Castle
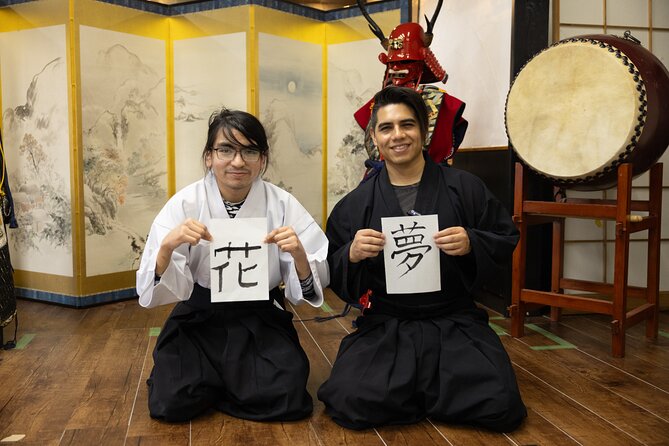
This is the kind of experience that makes Japanese culture feel practical, not performative. You’re not just watching someone write—you’re learning how Japanese calligraphy thinks with your body: how you sit, how you hold the brush, and how you guide each stroke.
What makes it especially good value is that the class bundles several “trip highlights” into one smooth session. You get traditional attire (kimono, and hakama or other options depending on what they fit you into), direct guidance from a shodo teacher, and a photo moment built in. And because you get emailed digital photos after, you don’t have to stress about getting everything perfect on your phone during the class.
First Moment: Dressing in Traditional Clothing (Plan for a Little Time)
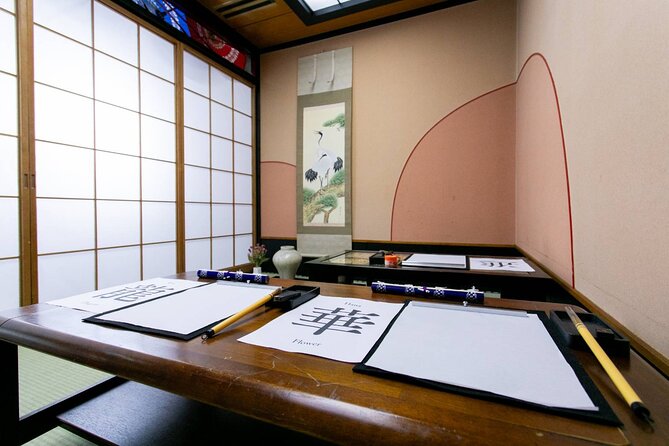
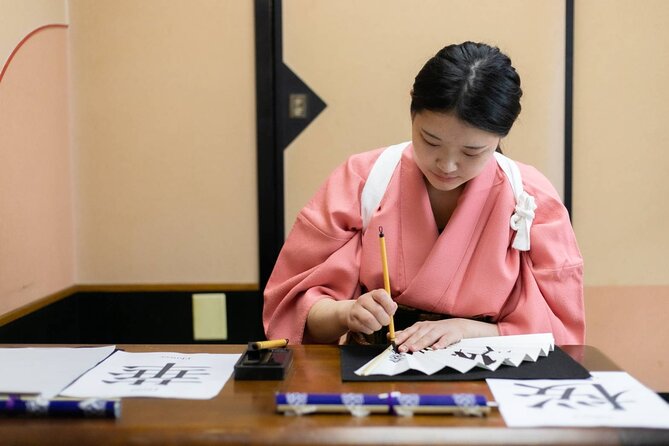
The session starts with you changing into traditional Japanese clothing—kimono first, and you may also wear hakama or similar items. This matters more than it sounds. Wearing the clothing changes your posture and your movement, and that affects how the brush work comes out.
Before you dress, do one simple thing that saves hassle: use the restroom. The class also asks you to sign a liability waiver before starting, so arrive ready to check that off.
Practical tip: if you’re sensitive to heat or sweat, dress accordingly underneath. The experience notes you’ll sweat more while wearing hakama or armor and practicing sword-related movements (even if your main activity is calligraphy, they’re still warning you about physical comfort during traditional culture practice). So I’d keep layers light and shoes/outerwear easy to manage before dressing.
You can also read our reviews of more tours and experiences in Osaka.



The Teacher-Led Mindset: What Shodo Is vs What People Expect
Once you’re settled, the teacher walks you through a mindset shift: shodo is not just decorative writing. It’s an art where technique and feeling connect—posture, pressure, and timing all shape the final form.
This is where you’ll hear the difference between calligraphy as it’s often practiced overseas and Japanese shodo. If you’ve ever tried to copy letters without understanding how the brush actually behaves, this part helps you stop fighting the characters and start working with them.
Then you’ll move into tools and basics. The class covers how to hold the brush and how to use the equipment properly—small adjustments that make a big difference fast.
Stroke Basics You Can Actually Use: Tome, Hane, Harai
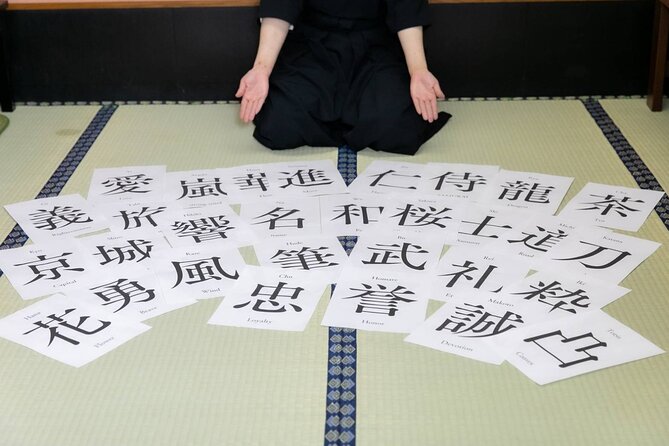
Here’s the heart of the learning: brush movement. You’ll practice the most basic brush strokes—tome, hane, and harai—and you’ll learn how each one feels different in your hand.
This is worth your attention because these aren’t just “cool Japanese words.” In practice, each stroke is about control at key points:
- Where the stroke stops cleanly (tome)
- The quick lift or direction change (hane)
- The sweeping movement that carries the form (harai)
If you come in thinking this will be a short intro and you’ll mostly take photos, you’ll be surprised by how much of the hour is truly technique practice.
Choosing Your Kanji: Make It Personal, Not Generic
You don’t do one random character. You choose your favorite Japanese kanji to work on—and then you practice it with purpose.
Kanji are famously hard, and the class treats that difficulty with respect. They also frame each character’s meaning: kanji carry multiple layers depending on the character itself, so your selection isn’t just aesthetic. It’s your personal choice for the lesson.
After you select, you learn stroke order—how the character gets built step by step. This part is crucial. Copying a finished shape feels doable. Writing with correct order usually feels harder at first, then suddenly clicks, because your hand learns the rhythm.
The Step-by-Step Flow: From Practice to Final Draft
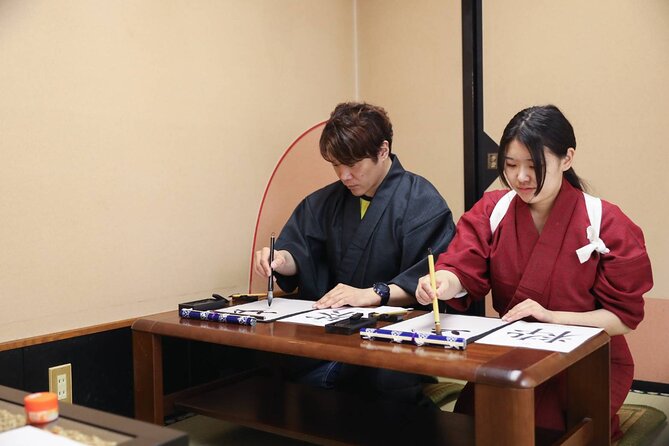
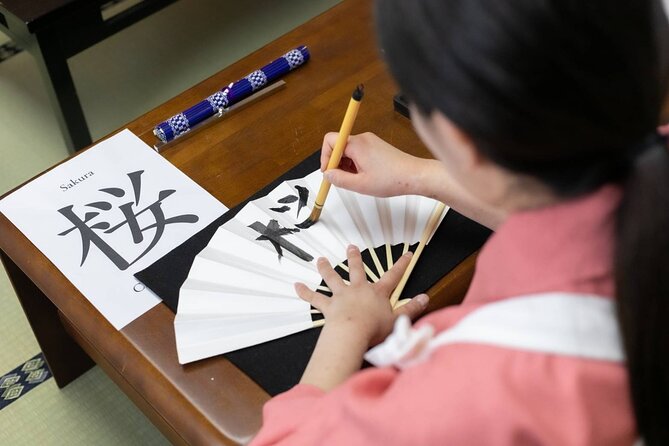
After stroke order, you practice. You also get tutoring while you write, which is the difference between improving and just leaving with shaky-looking art.
Next comes the “final draft” stage: you write your finished piece, keeping in mind what you learned so far. This is where you stop treating the strokes like disconnected moves and start treating them like a single character with a voice.
You’ll also get a surprise element: the teacher writes the foreign names of participants on wooden tags using the kanji characters they’ve chosen. That’s a fun souvenir because it’s tied to your personal kanji choice, not a generic pre-made memento.




Photo Time and Digital Souvenirs: Easy Memories After the Class
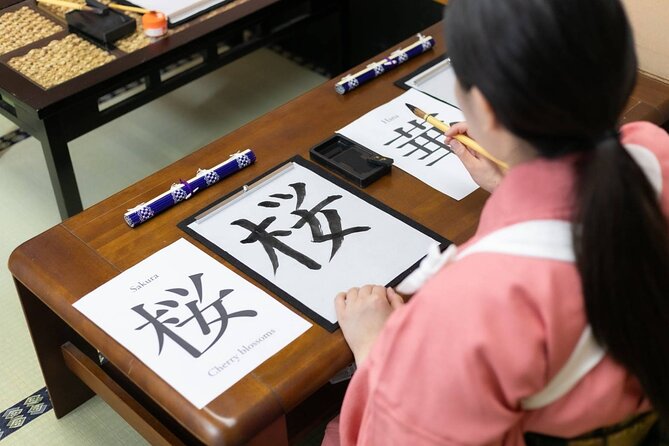
Once the art part is done, there’s a photo shoot. You’ll capture the kimono outfit and your calligraphy work.
What I like here is the mix of in-person photos and follow-up digital copies. The class includes photography, and the data is sent to a designated email address. So you’re not stuck relying only on your own phone timing while you’re still learning.
Also note the rules so you don’t accidentally slow the group down:
- Smartphone photography is permitted.
- Avoid selfies.
- Don’t photograph other guests.
- Refrain from fixed tripods or recording videos, since they can disturb other participants.
This makes the session feel smoother, and it keeps the atmosphere calm.
Small-Group Size Means Real Help (Max 10)
This class caps at a maximum of 10 travelers. That small number matters. You get more direct attention when your stroke is off, and you can ask questions without feeling like you’re interrupting.
The experience also includes an English-Japanese or Chinese-Japanese translator to help bridge language barriers. The default language is English, and other language options may be possible if you inquire, depending on staff availability.
In the reviews, the repeated theme is patience. The instructors help you work through your first attempts instead of rushing you to the finish line. That’s exactly what you want in calligraphy—because the basics matter, and you learn by doing them wrong first.
Value Check: $43.59 for One Hour of Culture You Can Take Home
At $43.59 per person for about an hour, the value comes from what you’re getting beyond the lesson itself:
- Professional shodo instruction (not just a demo)
- Traditional attire like kimono
- Help with your chosen kanji and stroke order
- Your final written piece
- A surprise souvenir: wooden tags with your name in kanji
- Photo time plus emailed digital photos
In other words, you’re not just paying for entertainment. You’re paying for coaching plus souvenirs. For a short time window—especially if you’re already doing Osaka Castle—you can turn this into a focused cultural stop rather than a long, low-yield side quest.
Timing and Finding the Place: Don’t Over-Rely on Google Maps
One concern shows up in real-world feedback: it can be tricky to spot the exact location. One review notes Google map directions were accurate but that the place is a small storefront, and it was easy to walk past it.
So here’s what you should do:
- Leave extra time to locate the storefront.
- Aim to arrive early, not right at the start.
- Be aware the experience says that if you’re more than 30 minutes late, you may be refused entry.
Also keep in mind there’s a specific meeting address in Osaka (Joto Ward, Shiginonishi area). The class is near public transportation, but that doesn’t always mean it’s visible from the street. Treat it like a “small stop,” not a “big landmark.”
Who This Fits Best (And Who Should Skip It)
This works best if you want a hands-on arts experience that’s still beginner-friendly. It’s open to all skill levels, and kids can participate too, which makes it a great family option.
It’s also a good choice if you’re pairing it with Osaka Castle. After walking around the castle area, you’ll like having a quiet, seated activity that feels connected to Japanese culture.
Skip it (or at least consider alternatives) if any of the following apply:
- Back problems
- Heart conditions
- You need stroller access (it’s not stroller accessible)
- You’re traveling with pets (not suitable for pets)
And yes, you’ll be asked to sign a liability waiver.
Should You Book It? My Practical Recommendation
If you want an experience that gives you something tangible—your own kanji work, a wooden tag souvenir, plus digital photos—this class is a strong bet. The structure is clear: dressing, mindset and tools, stroke basics, choosing and practicing your character, finishing your draft, and ending with photos. For a one-hour commitment, it packs a lot.
I’d book it if:
- You like hands-on lessons more than passive sightseeing
- You want kimono photos tied to real learning (not just dressing up)
- You’re curious about how Japanese stroke order changes outcomes
I’d hesitate if:
- You dislike structured classes with tight timing
- You struggle with finding small storefront locations
- You can’t sit comfortably for the practice portion
Overall, I’d plan on showing up early, bringing patience, and choosing a kanji that feels meaningful to you. That’s when the hour feels personal instead of rushed.
FAQ
FAQ
How long is the Japanese calligraphy class?
The class runs about 1 hour.
What’s included in the price?
You get lessons (introductory up to professional level), traditional Japanese attire such as kimono/hakama, photography with digital photos sent by email, and help from a translator for language support. You’ll also take home what you produce during the class.
Can kids join?
Yes. The class is open to all skill levels, so kids can participate.
What languages are available?
The default language is English. Other languages may be available if you inquire, based on limited staff availability.
Is there a limit on group size?
Yes. The class has a maximum of 10 travelers.
Is there an extra option for hair styling?
There is an optional paid wagami service (hair collected with kanzashi) listed at ¥3,300 per person.